Hello Sitecore Developers, welcome to my blog. When we start with Sitecore, there are many questions. How to install Sitecore? Has Sitecore made the installation easier? If yes then how? Well, Let's find out by reading through this blog. In this blog, I will be covering the installation of Sitecore 9.3 using Sitecore Install Assistant (SIA)
What is Sitecore Install Assistant (SIA)?
Sitecore Install Assistant is a GUI which Sitecore provides for making the installation easier and efficient. Sitecore has introduced this for the versions of 9.2 and above. Before SIA, Sitecore installation was a tedious job where you had to run PowerShell scripts and install various prerequisites. This would lead to a cumbersome task for the developers to setup their local environment.
So, Lets Begin with the Installation:
Prerequisites:
- Visual Studio 2015 +
- MS SQL Server - Let's Install Together
- Sitecore License File
- .NET Framework
Worried about the compatibility while installing Sitecore?
Downloading Setup Files:
- Navigate to Sitecore 9.3 Download Files
- Download the Graphical setup Package for XP Single which is highlighted in red
 This blog is about installing Sitecore in the local environment hence we will choose XP Single Package.
 - Once you download the XP Single Package > Extract the downloaded .zip file.
- Since we are installing Sitecore using SIA, open the Setup Application provided by Sitecore in Administration mode.
- A Sitecore Install Assistant GUI will be seen when you open the Setup Application. Before starting with the installation go through the prerequisites mentioned in the popup win

- Make sure you have a .NET Framework 4.7.2 installed before you move further. If it is not installed in your system, Download .NET 4.7.2
- Once you are clear with the mentioned prerequisites click on Start to proceed with the installation.
- You will see a Prerequisites window: SIA provides the capability to install all the prerequisites with just a button click. This has made a drastic change in the installation of Sitecore as compared to the previous versions where we had to install each and every prerequisites by ourselves.
- Install Prerequisites: While installing the prerequisites, you can check the logs if required

- Install Solr 8.1.1: We can proceed to the Next window after the Prerequisites installation is complete. The next window will ask you for some inputs before installing Solr. Fill the inputs highlighted in red.

- If you see the above screenshot, the following will have to be filled:
- Solr Port: In this blog, I am using Port 8996
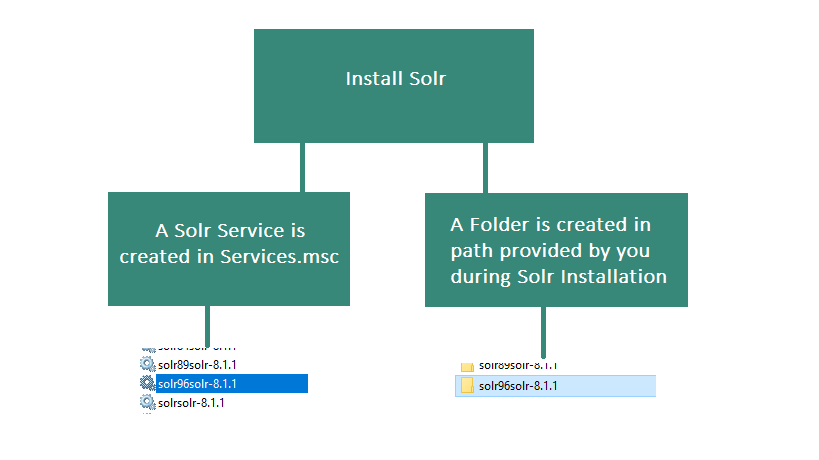
- Windows Service and path prefix: This will get added as a prefix to:
- The Solr Service that gets created.
- The Folder that gets created.
- Install Path: Mention the path where you want to install
- What happens when Solr is Installed?

- To verify if Solr is installed correctly, Go to Solr Url

- Add Sitecore Settings: Fill the section highlighted in red.

- Add SQL Server Settings: Fill in your SQL Server Details in the section highlighted in red.
- Verify the Solr Settings: Update if required

- SXA Module: You can check the checkbox if you want SXA Module installed with Sitecore.
 Note: If you are planning to install SXA, make sure you have a valid license for it as SXA is NOT INCLUDED in the primary license of Sitecore 9. You will have to separately buy the SXA license.
 - Summary: Review all the details provided before heading for installation

- Once everything is verified, proceed further and Install. Your fresh Sitecore instance will be ready in a short while 😊
- Installation Complete!!!!

- Click Launch Sitecore

- Login using credentials:
- Username: admin
- Password: The one which was created during Sitecore installation


Superb!
ReplyDeleteVery useful! Thanks for it. :)
ReplyDelete